
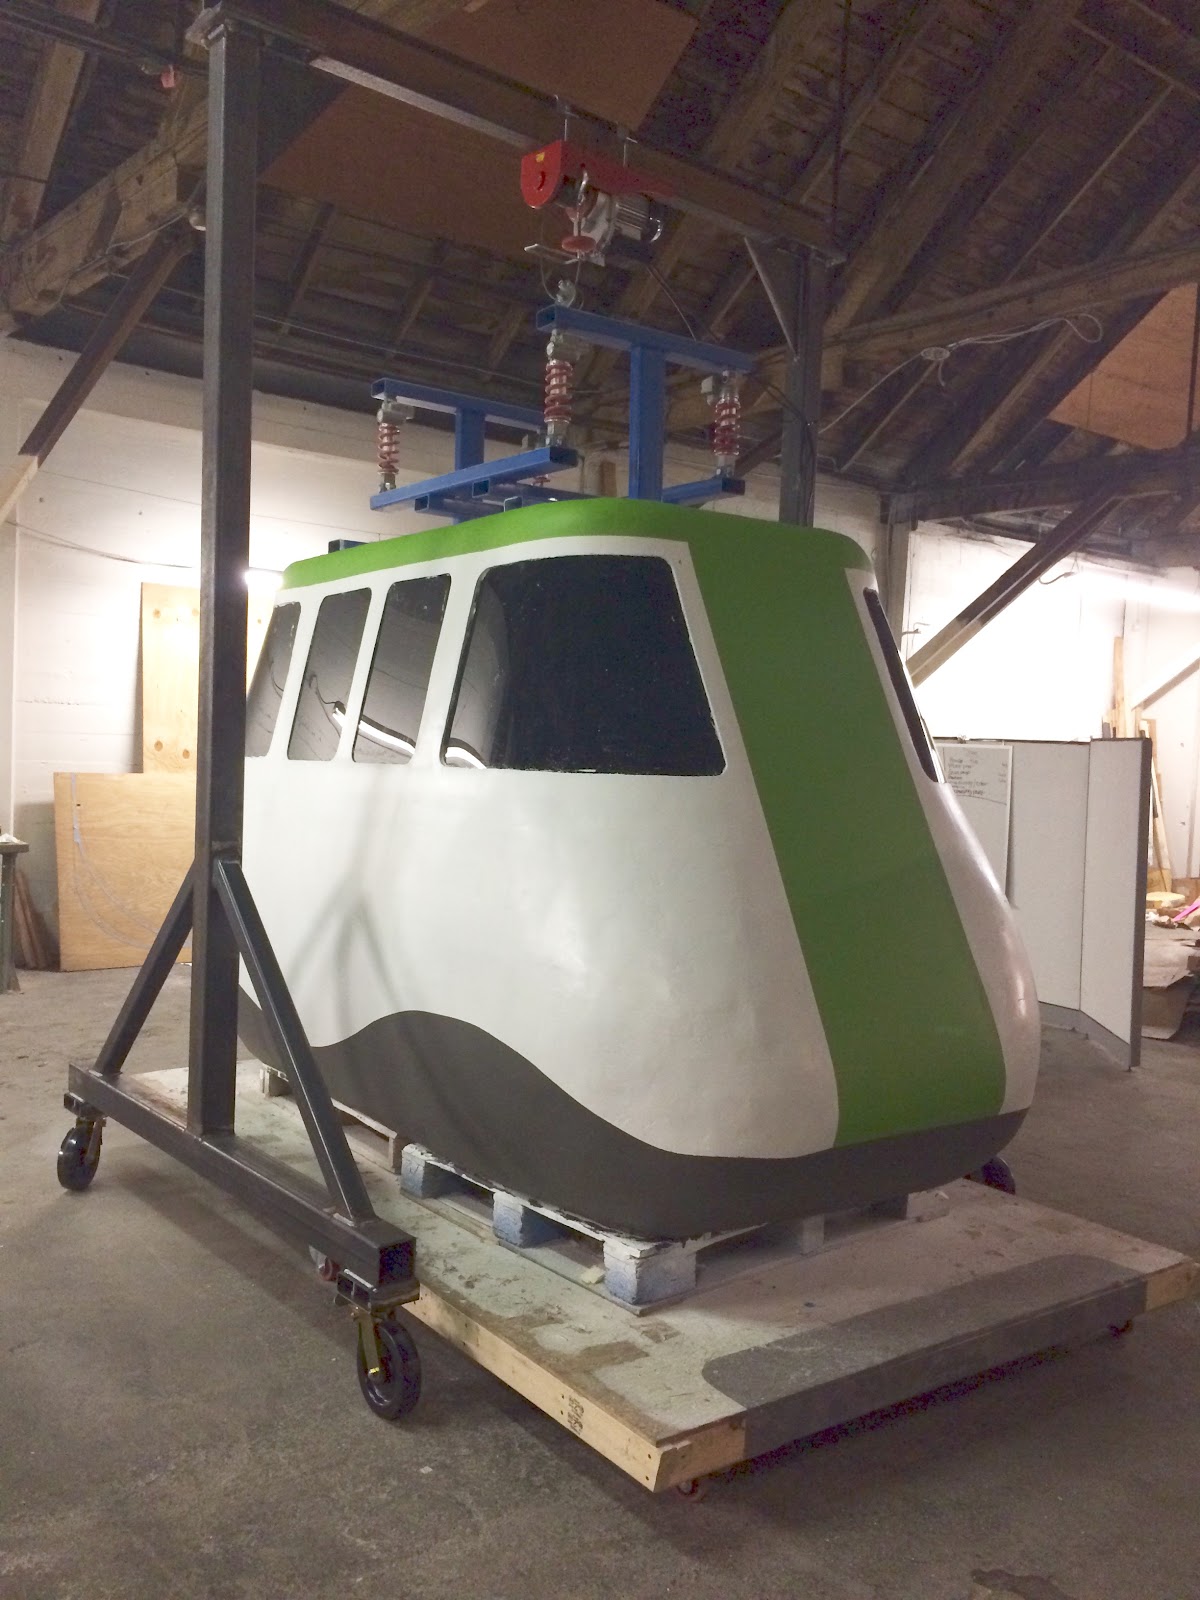
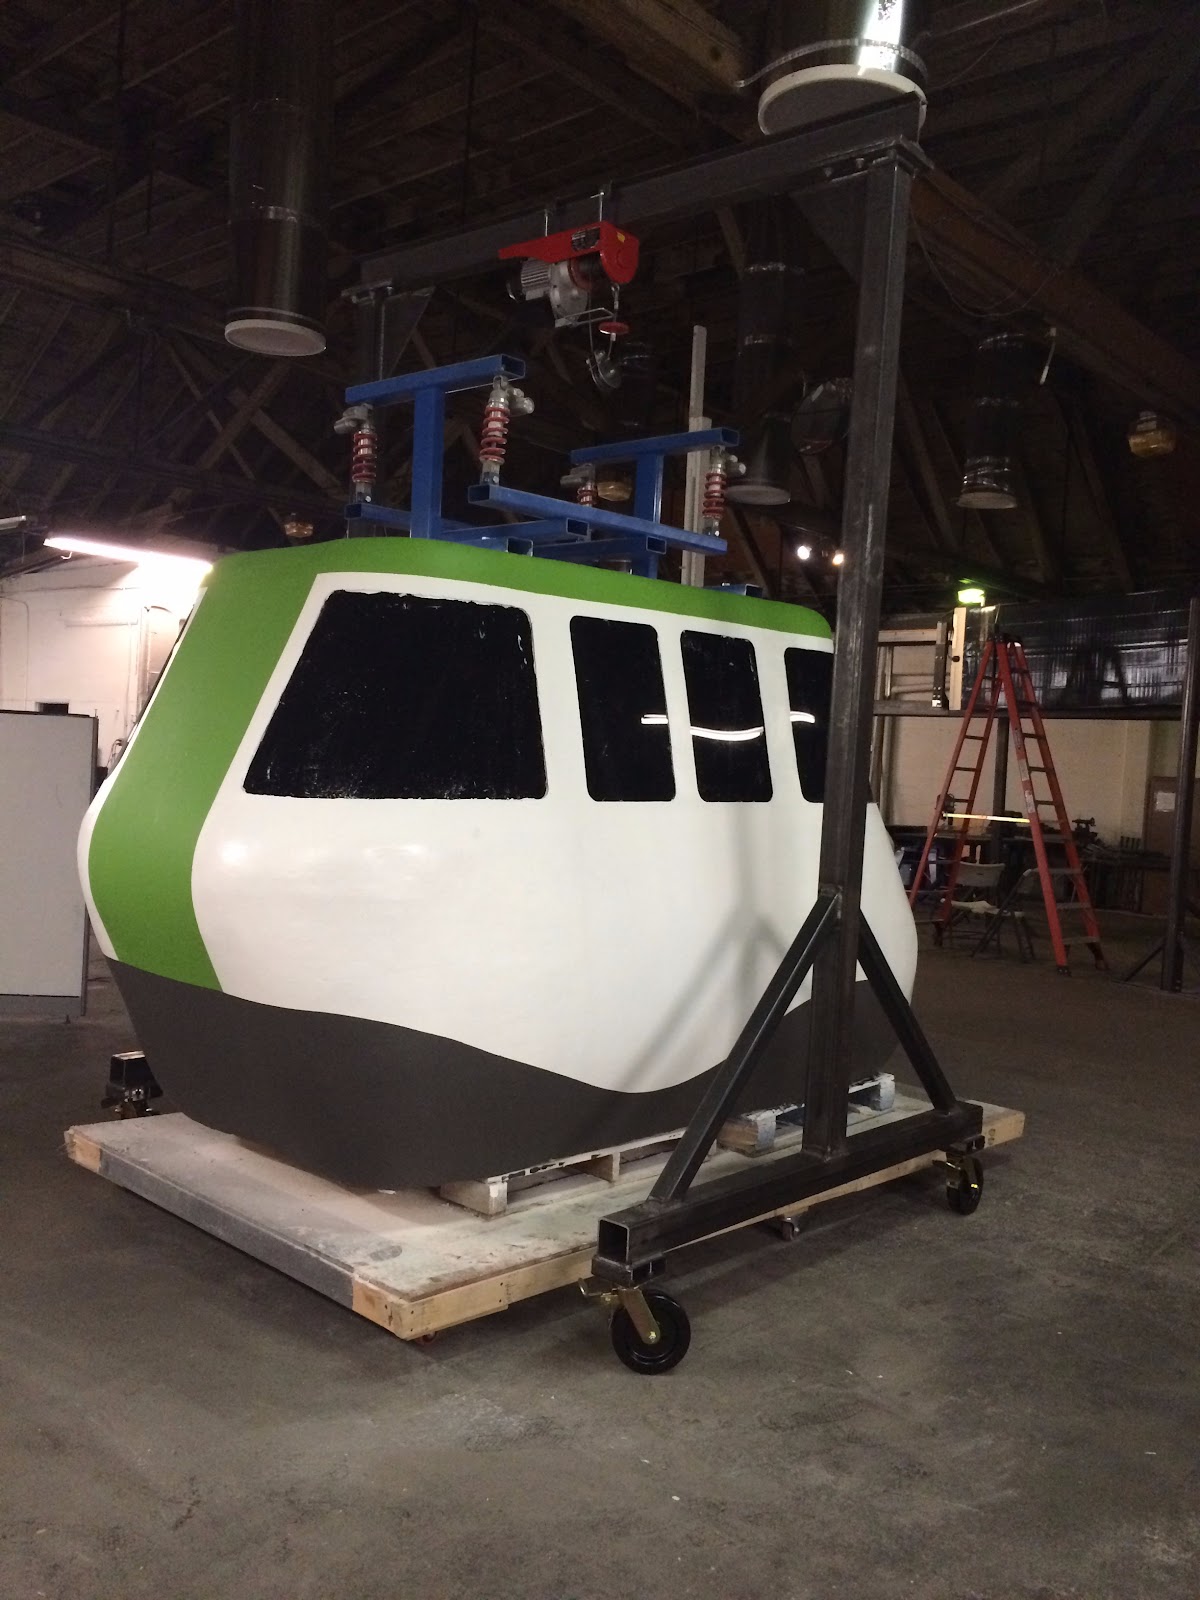
After the white paint dried and a few weeks later we began to use blue masking tape to sketch out the predetermined design. We also decided to keep the color scheme of green and gray.

Once the shape of the lines was clean and precise we began to paint both the green and dark gray portions. Rather than using the spray gun we chose to use small paint rollers, so we could reduce the chance of the color getting onto the white sections.

We ended up doing two coats for the green paint and one coat for the gray because it was already so dark. The painting portion went incredibly well with no mishaps, in relation to getting color on the white paint. Once the paint dried we removed the blue masking tape and the plastic covering from the windows. Once the window covering was removed it looked even better than before because it added great color contrast to the white paint. The lines came out extremely sharp and well defined, although there was some paint bleeding under the tape. If we have the time or skill to clean up the lines we may make an attempt.

Before Caleb left back for France he designed a gantry that would allow us to lift the cabin. This would allow us to simulate how it would look when suspended in the air, as well as allow for us to finish up the bottom of the cabin. Caleb did all of the designing, as well as the cutting of the steel beams and plates. We then took the parts to campus where we were given help in welding the pieces together.

We finally got the pieces bolted together through the use of a forklift because the pieces are extremely heavy and stand at around 12ft tall. We then attahced the lift to the steel frame and it is now ready to lift the cabin. Getting the cabin safely suspended is our next task.

I hope we did the Swedish team and Caleb proud. Their designs and hard work came out looking great!
No comments:
Post a Comment